Crown Molding Cheat Sheet
Crown Molding Cheat Sheet - Web the first step in cutting molding flat is making a simple set of templates, then using them to set up your saw for cutting the correct angles. Mark the bottom edge of one piece with a black marker (#1). Begin by cutting two 18 lengths of crown molding. Just follow the steps in photos below.
How to cut crown molding r/coolguides
Mark the bottom edge of one piece with a black marker (#1). Web the first step in cutting molding flat.

Tips and Tricks for Installing Crown Molding.
Mark the bottom edge of one piece with a black marker (#1). Web the first step in cutting molding flat.
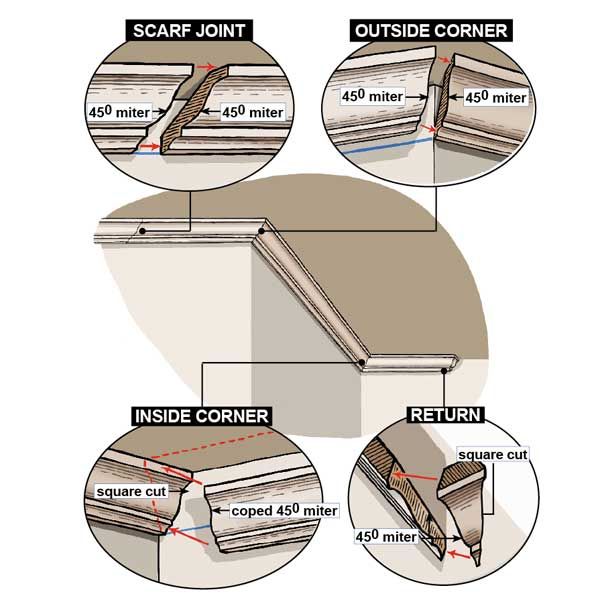
How To Install A Outside Corner Crown Molding On Vaulted Ceiling
Web the first step in cutting molding flat is making a simple set of templates, then using them to set.

Crown Molding Cheat Without Using Crown Molding Crown molding, Faux
Web the first step in cutting molding flat is making a simple set of templates, then using them to set.

Crown Moulding Miter & Bevel Angle Setting Chart
Begin by cutting two 18 lengths of crown molding. Just follow the steps in photos below. Web the first step.

Pin on Home Decor
Just follow the steps in photos below. Web the first step in cutting molding flat is making a simple set.
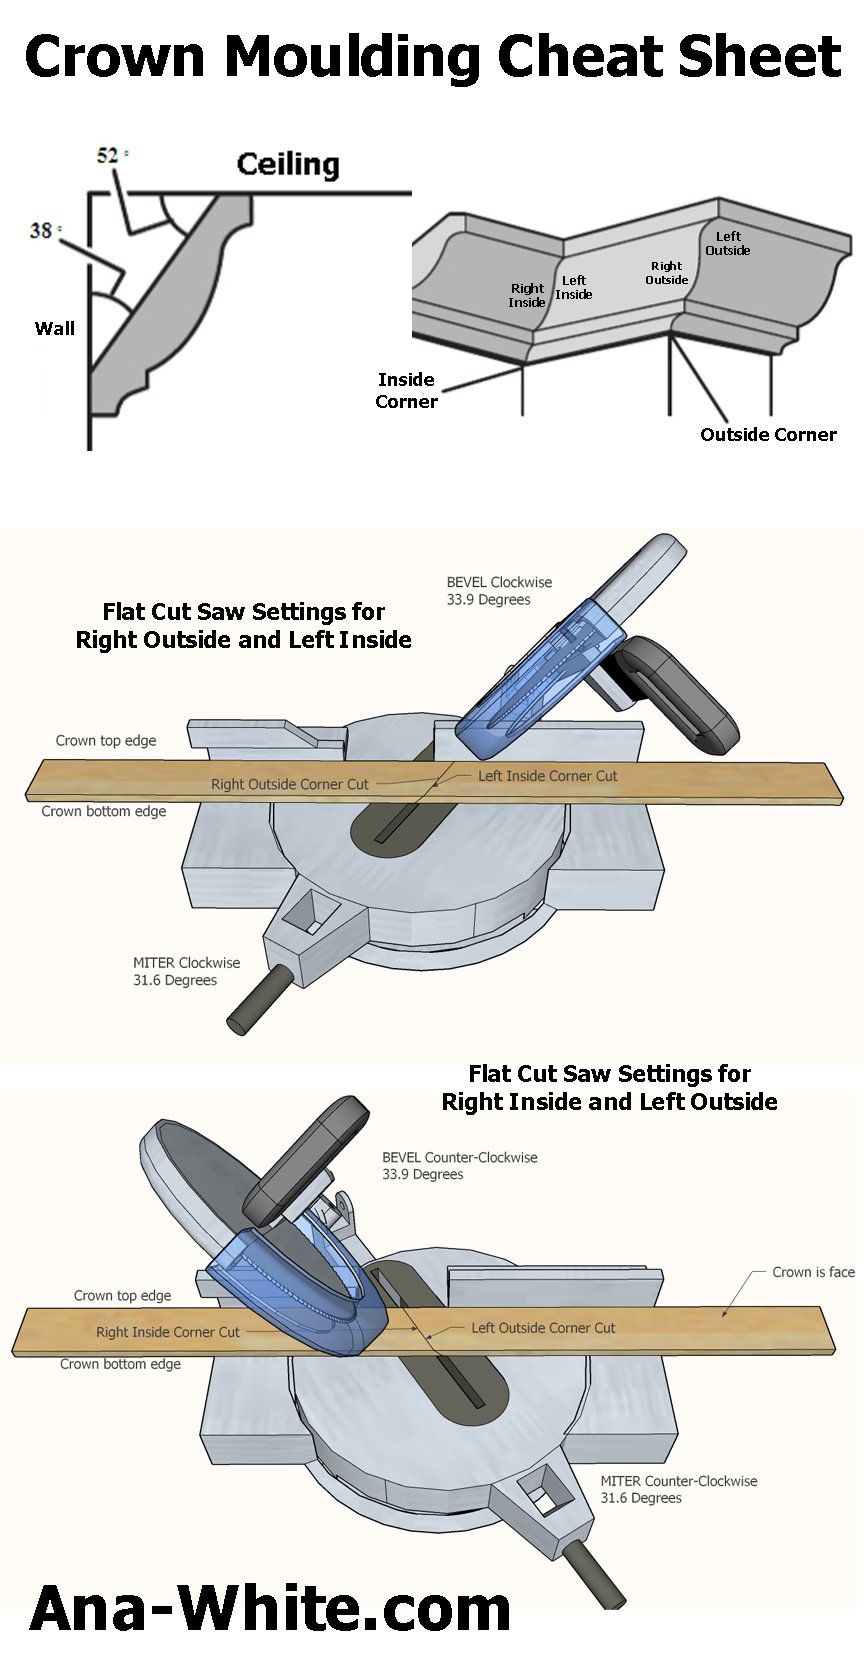
Installing Crown Moulding the Easy Way Ana White
Just follow the steps in photos below. Web the first step in cutting molding flat is making a simple set.

Do it yourself에 있는 핀
Web the first step in cutting molding flat is making a simple set of templates, then using them to set.

Pin on Cheat sheets
Web the first step in cutting molding flat is making a simple set of templates, then using them to set.

DIY Tutorial Crown Moulding Crown molding, Diy molding, Moldings, trim
Just follow the steps in photos below. Web the first step in cutting molding flat is making a simple set.
Begin By Cutting Two 18 Lengths Of Crown Molding.
Just follow the steps in photos below. Web the first step in cutting molding flat is making a simple set of templates, then using them to set up your saw for cutting the correct angles. Mark the bottom edge of one piece with a black marker (#1).